Garage Floor Epoxy Kit - High Solids System (4 Car Garage)
-
$681.48
Customise your product


Available Options
Videos and Instructions
FREQUENTLY ASKED QUESTIONS
Large Project? Get a Quote Here
Covers 798 sq. ft. (133-267 sq ft/gal @ 6-12 mils). Recommended for garages, warehouses, offices, and so many other spaces needing a high-performance resinous flooring solution with superior chemical resistance and high-impact protection.
Includes HD-PRO, our High Solids epoxy system which is 93% solids gloss epoxy. It's easy to install, and it's industrial grade. This system is very versatile and can be applied at 6mil or 12mil. We recommend applying at 12 mil using a serrated squeegee.
This kit is marked on sale from $868.48 to $681.48! That's a $187 in savings!
HERE'S WHAT'S INCLUDED IN OUR 4-CAR (798 SQ FT) GARAGE KIT:
Epoxy Included (HDPRO)
• (2) 3 Gallon Kits of HDPRO - Industrial Grade High Solids Epoxy.
Broadcast Options -
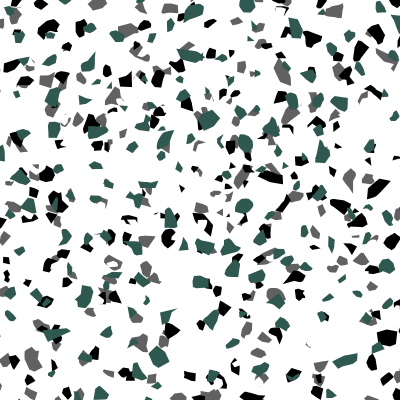
We now offer flakes as an upgrade due to high demand. Instead of including flakes, we now enabled you to select if you even want the flakes to begin with!
• Partial: 5 lbs *Note: 5 LBS Included in this option. Use as little or as much as you want to get your desired look.
• Medium: 25 lbs
• Heavy: 40 lbs
• Full (broadcasted until rejection): 90 lbs
Tools Included in This Kit:
• (1) 5 Gallon Helix Mixing Tool (Drill not included)
• (1) 9" 3/16" Nap Roller cover
• (1) 9" Roller Frame
• (1) 3" Paint Brush
• Easy Step by Step Application Instructions (Downloadable PDF or Video)
Tools NOT Included in This Kit (HIGH RECOMMENDED):
• 18" - 8-12 mil Serrated Squeegee - Highly Recommended for Faster Installation Time and to Ensure Proper Thickness. (See Instructional Video)
• 18" Flat Squeegee - Choose This Option if you are familiar with using a Flat Squeegee or if you chose to apply primer.
• Gunite Spiked Shoes - Necessary to Install Epoxy
• 18" Roller Frame and 18" Roller Covers. For HDPRO as Prime coat use a 3/8" nap roller after spreading with a flat squeegee. For 12 mil coat use 18" - 3/16" Nap Roller after spreading with 8 to 12 mil notched squeegee.
Optional Top Coats
• WBG - Waterborne Urethane - When you select this option you will receive (1) 1.5 gallon kit and (1) 3/4 gallon kit. Use a 3/8" nap roller to get a 3 mil coating. LOW V.O.C. Residents of California can purchase this urethane. If you live in CA we offer a variety of low-VOC urethanes, so please get in touch with us for more information.
• SPE-HDI - 1 Component Moisture Cured Urethane - One of our best urethanes and the most cost-effective! Sorry, can not be sold to CA residents. With this kit, you will receive 2 gallons. 400 sq ft @ 4 mils and 800 sq ft @ 2 mils per gallon.
IMPORTANT! PLEASE READ IF YOU ARE A RESIDENT OF CALIFORNIA
(*NO CA) / If you see this next to the option that means we cannot ship to residents of California.
We offer a variety of urethane top coats. HDI is one of our most popular urethane topcoats because of the price, superior durability, and the ease of application. However it has a very harsh smell during the application process. This urethane is not California VOC compliant and we cannot ship this product to residents of California because of the strict policies of CA VOC laws.
THE GOOD NEWS FOR CA RESIDENTS or our customers that need a LOW VOC top coat.
The good news is that we offer several choices for residents in California or customers that need a LOW VOC top coat!
Here's a list of LOW VOC urethanes that we offer:
1. WBG - Waterborne Urethane.
Often times people think that since it's a waterborne product that the quality won't be the same as a NON VOC product. This simply isn't true! We use special formulations to ensure that our customers receive the highest grade product possible! Since there is a need due to a variety of situations such as VOC laws, applications where the business closes one half of the facility and keeps the other side open during flooring renovations, and even for the customer applying epoxy with an attached garage, a basement, or a floor inside the home. There has been a need for coatings that have little to no smell for decades now, and Spartan has always led the way. So feel confident that WBG will handle the toughest of flooring situations!
2. TC92 - Is a High Wear 3 component urethane top coat.
You can choose to leave part C out and that will provide a glossy finish, or add it into the Part A and B and you will get a satin finish. TC92 is designed to be applied as a 1 coat application.
3. WB ONE - Acrylic sealer with a beautifully smooth high gloss finish that adds extra protection with the high dollar amount! Check out WB ONE here.
If you are looking for a faster set polyaspartic urethane you can visit this link. If you are new to applying polyaspartics, please purchase HP44.
For questions regarding any of our coatings please email us at spartanepoxies@gmail.com, use our contact form or give us a call at 877-288-1952.
We highly recommend you use spiked shoes. We can't guarantee your local hardware store will carry them so for your convenience we offer them. One size fits all. They strap to your shoes/boots. You can select the radio box and have them shipped with your order.
Store product in a controlled temperature area/room to bring the material to normal room temperature before using. Continuous storage should be between 60 and 90 degree F. Low temperatures or great temperature fluctuations may cause crystallization. Coatings may cause surface to become slippery under certain conditions. If you require additional slip resistance a non skid additive may be required. View our anti-slip additive here. Keep out of the reach of children. Refer to Product label and MSDS for additional safety precautions.
STEP 1: SURFACE PREPARATION
Perform a Moisture Test: A test should be made to determine that the concrete has an appropriate vapor barrier. This can be done by placing a 4’X4’ plastic sheet on the substrate and taping down the edges. If after 24 hours, the substrate is still dry below the plastic sheet, then the substrate does not show signs of eventual hydrostatic pressure problems that may later cause disbonding.
Clean the Floor All dirt, oil, dust, foreign contaminants and laitance must be removed to assure a trouble free bond to the substrate.
Prepare the Surface Grind, shot blast or acid etch the surface.
NOTE: Ensure floor is rinsed properly and dry before applying epoxy.
STEP 2: APPLICATION
Mix Product
Prior to mixing, make sure the mixing pail is clean and free of any debris.
Mix and transfer 1 gallon container of Part A and ½ gallon container of Part B into the provided mixing pail.
Mix at a slow to medium speed with the mixing equipment provided with the kit (2 to 3 minutes), making sure to scrape the sides and bottom of the mixing pail thoroughly. Any unmixed liquids will not cure properly and will cause areas in your surface that are soft and possibly will not cure at all.
Do not use partial kits. DO NOT LIFT THE MIXING TOOL IN AND OUT OF THE EPOXY, DOING SO WILL CAUSE AIR TO BE INTRODUCED AND MOST LIKELY CAUSE BUBBLES.
Apply Product
Maintain temperatures within 60-90 degrees F with relative humidity below 85% during the application and curing process.
Technique 1 / Pour and Roll
Pour a ribbon of mixed epoxy onto the prepared surface. Roll coating out with a ¼” nap roller. Use the provided brushes to cut in around the edges – areas that your roller will not reach. A 1 ½ gallon kit is enough material to coat approximately 199.5 sq. ft. As you roll out the mixed material, broadcast chips into the wet epoxy. To do this, spread the chips by tossing them slightly up into the air and allowing them to settle into wet epoxy as you progress. Do not roll over the top of the paint chips once they are on the floor. Estimate the chips to use to make sure they are evenly spaced to prevent running out of chips before the end of the coated floor.
Technique 2 / Pour Ribbons, Push with Serrated Squeegee
Pour a ribbon of mixed epoxy onto the prepared surface. With your Serrated Squeegee (3/16" notched for 12mil coating / 1/8" notched for 10mil coating) push epoxy at an angle. If you left ear is facing wall, angle squeegee at 20 to 30 degrees. Have a chip brush in your hand and you can cut in the edges as you move. Think of a snow plow, how it pushes the snow off the side of the road. You will be pushing the extra epoxy to the right. Next think of mowing your grass, you're going to push the extra material towards the middle of your surface until you reach the center of your floor. Next use a 1/4" nap roller and roll in any areas that may not have been coated, then back roll the entire surface. You can start towards the back and roll an area that is large enough to accept chips. Begin broadcasting your chips, remember not to roll over any chips with you roller. If you can move fast enough, you can back roll first, then broadcast your polymer chips. Back rolling helps the epoxy to self level and removes squeegee marks. Remember you want to broadcast your chips while the epoxy is still wet. Wet epoxy will enable the chips to sink in. Move fast and have help if needed.
Tips for Broadcasting Your Chips
Spread the chips by tossing them slightly up into the air and allowing them to settle into wet epoxy as you progress. Do not roll over the top of the paint chips once they are on the floor. Estimate the chips to use to make sure they are evenly spaced to prevent running out of chips before the end of the coated floor.
This material has a usable pot life of about 20 to 35 minutes depending on temp.
Allow epoxy to dry. At 70 degrees F, the floor should be ready for light foot traffic within 12-16 hours. For heavier traffic allow the floor to fully cure, 2-7 days.
Recommended: You may want to apply a clear topcoat to your epoxy floor. Please consult with your representative for available options. You can visit our Top Coats here.